Installing a smart toilet might seem intimidating at first, but with the right tools and guidance, it can be a straightforward process. Whether you're upgrading your bathroom or embracing modern technology, this guide will walk you through each step to ensure a smooth installation. By the end, you’ll have a fully functional smart toilet enhancing your bathroom experience. Before diving in, explore some of the best smart toilet options to find the perfect fit for your needs.
Tools and Materials You’ll Need
Before starting, gather the following tools and materials:
- Adjustable wrench
- Screwdriver (flathead and Phillips)
- Drill (optional)
- Level
- Tape measure
- Plumber’s putty or silicone sealant
- Teflon tape
- Supply line (if not included with the toilet)
- Smart toilet unit and its accompanying accessories
Ensure the area is clean and that you have access to the water supply and electrical outlet.
Prepare the Installation Area
- Turn off the water supply: Locate the shut-off valve near the existing toilet and turn it clockwise to stop water flow.
- Remove the old toilet: Flush the toilet to drain most of the water.
- Use a sponge or towel to absorb remaining water in the bowl and tank.
- Unscrew the bolts securing the toilet to the floor and lift it away carefully.
Inspect the flange: Clean and inspect the flange for damage. Replace it if necessary.
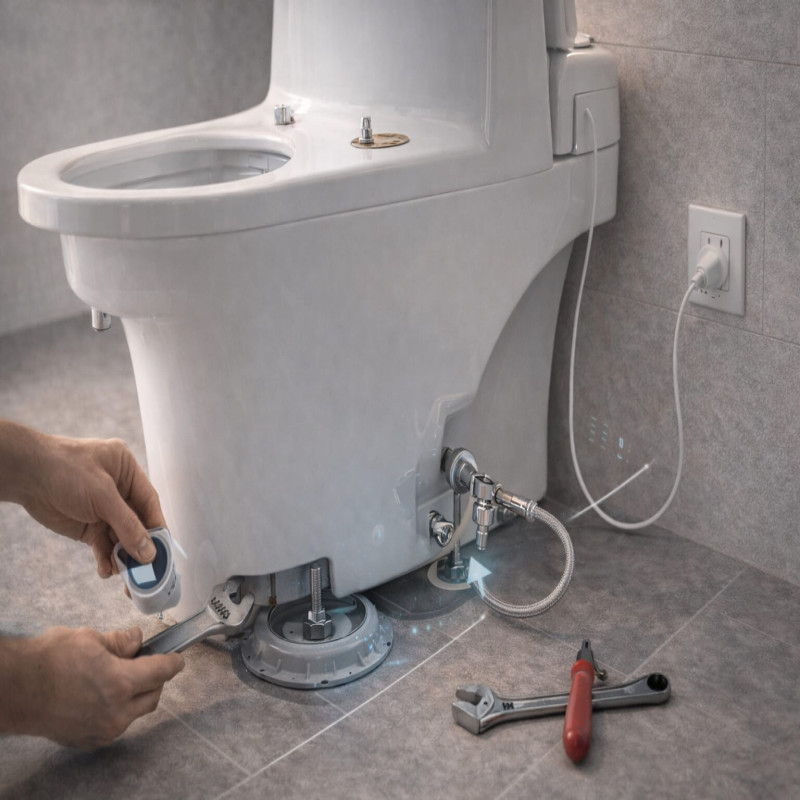
Position the Smart Toilet Base
- Align the toilet: Place the smart toilet base over the flange, ensuring the bolt holes align.
- Secure the base: Insert bolts through the flange and tighten them gradually using a wrench. Avoid over-tightening, which could crack the porcelain.
- Check the alignment: Use a level to ensure the toilet base is perfectly straight.
Connect the Water Supply
- Attach the supply line: Connect one end of the supply line to the toilet’s inlet valve and the other to the shut-off valve.
- Seal the threads: Wrap Teflon tape around the threads to prevent leaks.
- Turn on the water: Slowly turn the shut-off valve counterclockwise and check for leaks.
Set Up the Electrical Connection
- Locate the power outlet: Ensure the outlet is nearby and GFCI-protected for safety.
- Plug in the toilet: Use the power cord provided with the unit. Secure excess cable to avoid tripping hazards.
- Test the power: Switch on the toilet to verify its electronic functions, including heated seats, bidet settings, and other features.
Configure Smart Features
- Download the app: Refer to the manufacturer’s instructions to download the smart toilet’s companion app.
- Pair your device: Follow on-screen instructions to connect the toilet to your home Wi-Fi network.
- Customize settings: Adjust water temperature, pressure, and other preferences through the app.
Final Adjustments and Testing
- Seal the edges: Apply plumber’s putty or silicone sealant around the toilet base for added stability and to prevent water seepage.
- Check all connections: Inspect water and electrical connections for any leaks or loose fittings.
- Test the toilet: Flush the toilet and try its smart functions to ensure everything operates smoothly.
Maintenance Tips
- Regularly clean the smart toilet using non-abrasive cleaners.
- Periodically check the water and power connections for wear or leaks.
- Update the toilet’s firmware through the app for optimal performance.
Conclusion
Installing a smart toilet is an investment in comfort and convenience. By following this guide, you can enjoy modern features like heated seats, automatic flushing, and app controls without hiring a professional. Start your upgrade today and transform your bathroom into a hub of innovation and luxury.
Meet Your Guide

Go Soundproof Team
The Go Soundproof Team is a group of soundproofing enthusiasts and product testers dedicated to helping you create quieter, more peaceful spaces. We review and test the latest quiet appliances and noise-reducing solutions to provide honest, expert advice you can trust.